There’s nothing quite as disappointing as finally clicking “order” on a stunning piece of jewelry, waiting days for it to arrive, and then realizing it’s either choking your wrist or threatening to fly off every time you wave hello. I’ve been there more times than I’d like to admit. We often focus so much on the stone or the metal that we forget the most basic part: the fit.
In the world of wealth and Feng Shui, we talk a lot about the flow of energy. If a bracelet is too tight, it’s not just uncomfortable—it’s literally constricting. If it’s too loose, it’s a distraction. Getting the size right is about more than just fashion; it’s about making sure that piece of jewelry feels like a natural extension of you. If you’re wondering how to measure bracelet size without a professional jeweler’s kit, don’t worry—it’s actually much easier than it looks.
Why a Good Fit Matters More Than You Think
Before we grab the measuring tape, let’s talk about why we’re doing this. I used to think I could just guess. I figured my wrists were “medium” and left it at that. But here’s the thing—wrist shapes vary wildly. Some of us have very prominent wrist bones, while others have a more rounded shape.
A well-fitted bracelet should have a little “breathing room.” You want it to move slightly as you move, but not so much that it slides down to your palm or gets caught on your desk while you’re typing. When you find that sweet spot, you’ll forget you’re even wearing it, which is exactly how a daily piece should feel.
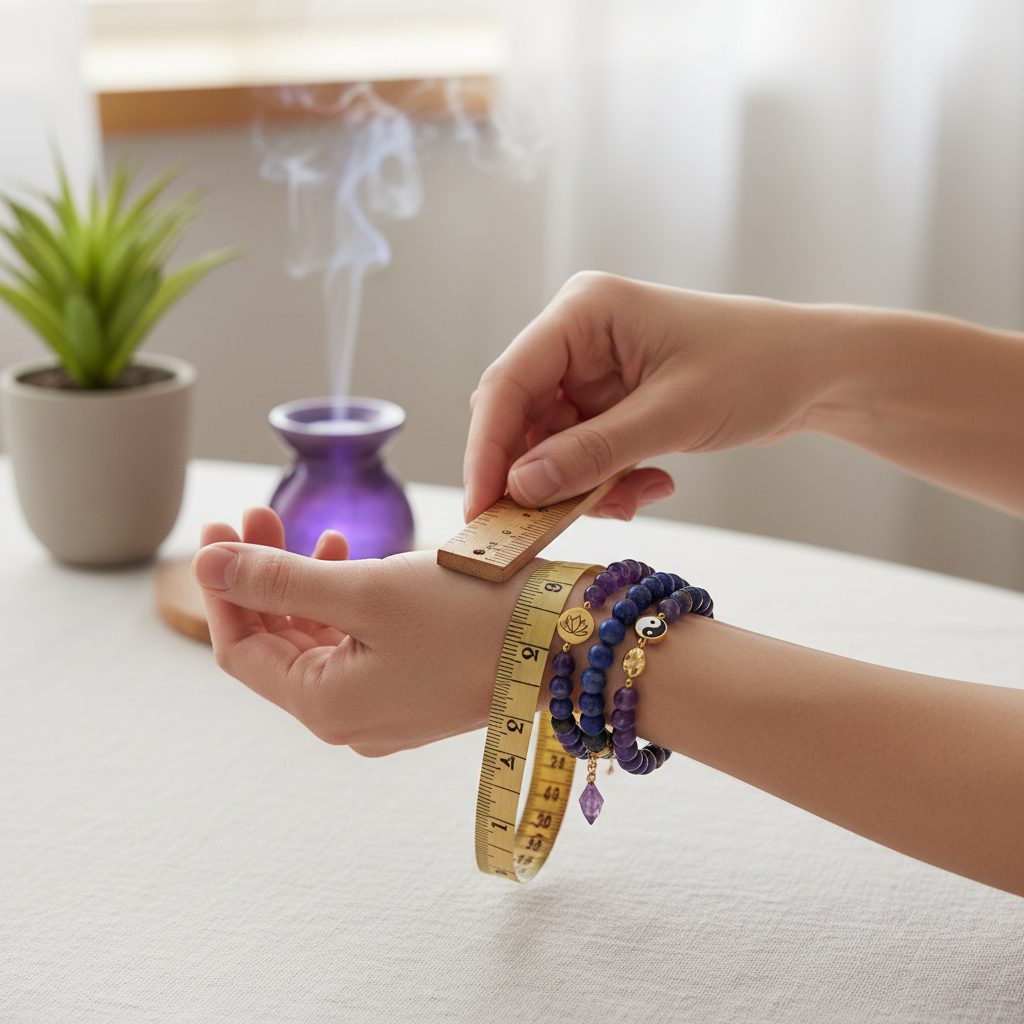
The Tools You’ve Already Got at Home
You don’t need anything fancy to get an accurate reading. In fact, you probably have everything you need sitting in a junk drawer or a sewing kit. Here is what I usually recommend using:
- A flexible measuring tape (the kind tailors use)
- A plain piece of string or a strip of paper
- A standard ruler
- A pen or marker
If you have a flexible tape measure, that’s the gold standard. But if you’re like me and can never find yours when you need it, the string-and-ruler method works just as well. Trust me, even a piece of dental floss can do the trick in a pinch!
Step-by-Step: Getting the Number Right
Let’s walk through the process. You want to measure the part of your wrist where the bracelet will actually sit—usually just below the wrist bone (towards your hand).
First, wrap your measuring tool around your wrist. You want it to be snug but not digging into your skin. If you’re using a string, mark the exact point where the end meets the rest of the string with your pen. It’s better to mark it while it’s still on your wrist to avoid losing your place.
Next, lay that string flat against a ruler and note the measurement in inches or centimeters. This number is your wrist circumference. But wait—don’t go buying a bracelet in that exact size yet! If your wrist is 6 inches and you buy a 6-inch bracelet, it won’t close. Or if it does, it’ll be uncomfortably tight.
The Secret to the Perfect “Drape”
This is the part most people skip, and it’s why their bracelets never feel quite right. You need to add a little “ease” to your measurement. How much you add depends on how you like your jewelry to feel:
- Snug Fit: Add about 1/4 to 1/2 inch to your wrist measurement. This is great for delicate chains that you don’t want moving around too much.
- Comfort Fit: Add 3/4 to 1 inch. This is the “sweet spot” for most people and works well for beaded bracelets or standard links.
- Loose Fit: Add 1-1/4 inches. Choose this if you like your bracelets to hang low near the base of your thumb or if you’re wearing a chunky statement piece.
I personally prefer a comfort fit. It gives the piece enough room to move with my pulse but stays secure enough that I’m not constantly adjusting it throughout the day.
What About Bangles?
Measuring for a bangle is a completely different beast because it has to fit over your hand, not just sit on your wrist. To do this, tuck your thumb into your palm (as if you’re about to slide a bangle on) and measure the widest part of your hand—usually around the knuckles. That measurement is the minimum circumference the bangle needs to be to actually get onto your arm.
It’s a common mistake to measure the wrist for a bangle, only to realize later that there’s no way it’s getting past your thumb. I’ve seen it happen dozens of times, and it’s a total headache to fix.
Now that you know how to measure bracelet size correctly, you can shop with a lot more confidence. Whether you’re looking for a piece to attract abundance or just something that looks great with your favorite watch, getting the size right is the first step to enjoying your jewelry for years to come. Have you ever had a “bracelet fail” because of the wrong size? It’s a lesson we usually only have to learn once!